Altered Cigar Box

What a fun project this one was. I picked up this sweet little cigar box a few weekends ago when we were out of town at a huge antique and collectible flea market. It's so perfect only measuring 3 3/4 X 5 1/2. I just couldn't resist it and it was super cheap (score!). I was looking through my stash of paper collections and came across a 6x6 pad called: Mad Tea Party by Marion Smith and knew I wanted to do something with it and since my cigar box was small, I thought this is just perfect! So, I altered the box using that collection and love how it turned out. I also inked all my papers using Prima's Color Philosophy in Chat Noir. I will be sending this one out to a swap partner this summer in an 'Altered Cigar Box Swap' and hope she likes it. I gessoed the box first then added the black coloring. Next I papered the outside and inside of the box using the Mad Tea Party papers. I did use some black 'hockey stick tape' on the hinged area to insure strength and to keep it from cracking after being used, works great. I added the heavy metal clock face and of course added the moveable hands to the clock along with a matching metal handle. On the handle I added some jump rings and had a clock charm that was perfect to go along with the theme of the paper.
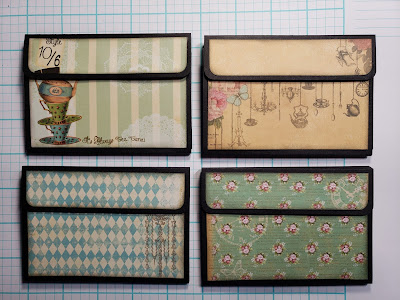
Inside the box is papered of course with yet another one of the sweet pattern papers in the collection. Again, all the papers were inked, I just think it gives a finished appearance. Inside the box, I made 4 photo pouches/boxes, They will each hold about a dozen pics easily. I tied them together with a ribbon just to add a little something to them. They each have a magnet closure to keep your pics all safely in place. I just love the papers in the collection!! These little photo pouches/boxes are constructed using an accordion method to expand and hold the maximum amount of pics. Such an easy project that I loved creating. I will include a cutting guide below for the photo pouches/boxes.
Accordion Photo Pouches/Boxes Cutting Guide
Using cardstock, cut at 4 5/8" x 7 3/4" Score on the 7 3/4 along the top at: 1 1/4. 1 1/2. 4 3/4 & 4 7/8
Hinges: cut 2 from cardstock at: 3" x 2 3/4"
Score with 3" along the top at: 1/2 . 1 . 1 1/2 . 2 . 2 1/2
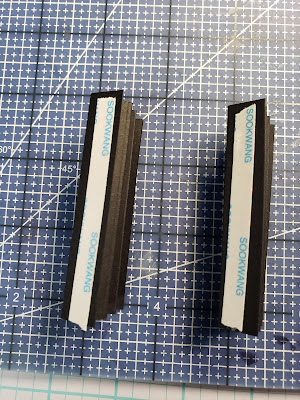
Accordion fold as shown. Burnish all score lines on all pieces.
Add score tape to both sides of each hinge. Burnish.
Remove tape backing and stick down to each side of the main piece as shown. Be sure to place the accordion folded hinges with the fold facing the outside and aligned on the outer edge. Remove the top tape backing pieces and carefully line up the folded piece folded over and stick it down.
Round the corners on the top of the piece and add a small magnet. I also apply a piece of scoretape across the magnet for extra hold. It will be covered with pattern paper and won't be seen anyway.
Allow the other magnet piece to stick to the first one and lining up the top folded piece, fold over and stick down the other magnet section. I also add a piece of score tape for extra strength. Of course when you are ready to add your pattern papers, remove the tape backing from the magnets and cover with pattern paper.
I always ink my papers before applying as I like the appearance and feel it gives a finished look, but if you prefer no ink, so be it.
Super easy and super useful! These can be made to fit any size you'd like and by making the accordion hinges with more folds, you can make them more expandable to hold even more!! So, enjoy and create what you like!
Note:
I will be posting another project, so be sure to check back shortly.
Please take a moment to check out my youtube channels: Brenda Crouch & bren crou
/


No comments:
Post a Comment