Altered Cigar Box / Recipe Box
I love altering cigar boxes and I am always on the lookout for boxes. I had no idea at first how many different sizes and shapes were available.....but trust me when I say there are M A N Y! I like how this quick one turned out. When I saw these 2:
I knew I had to grab them because I would do something with them. So, they sat on my Cigar Box shelves for a while....and just the other day, I thought, hmmmmm that would sure make a cool recipe box! So, that is exactly what I did with one of them. I will come up with something else for the other one I'm sure. I loved how the lid opened and the front was open....made for an interesting box.
On one side I added some matted cut a parts from the collection: BoBunny Kiss The Cook & Family Recipes. There was several to choose from, but I liked how these seemed to go easily with what I had already put together. I pop dotted the Carnation Milk one to add some dimension (I love dimension).
The other side. I have had the spoon and fork for ages and don't even recall where I got them, but as I was searching through my stash for things to use for this project, I ran across them and thought PERFECT! I thought the size and style were a perfect fit and it brings another touch of raised embellishments to the project.
The bottom of course can't be left out. I had some bare wooden pieces in my stash and these I thought were the perfect fit for 'feet' for this recipe box. I used a black permanent Sharpie to color them (be sure to wear gloves) and voila! Feet! I try to remember to add my stamp to the underside of my creations.Lifting the lid, I put a pocket on the lid underside and it holds some more of those cool cut a parts I matted. Notes are more recipe cards could be stored there as well. Inside the box, there are 8 recipe card holders. Each holder would accommodate approximately 40-50 recipe cards, so that's like 400 recipes contained in this snazzy little recipe box. I am going to make my own recipe cards and add tabs on the tops but haven't decided just yet on what I want them to look like. I will share that once I create them.
Just a little sample of a prototype recipe card with a tab. Had to make sure the size what appropriate and the tab wouldn't interfere with the top closing. I want something a bit different, so that's why I will be making my own.
Once I had finished the box..... I knew I wanted something for the top. Had to be something that would stand out..... That's when the easel idea came to mind and so I created one to stand the recipe cards on and added a little clip on the side to hold the card firmly in place. I think it set the recipe box off and I was pleased with the finished look.
Expanding Pocket Recipe Files Cutting Guide
Finished size: 5 X 4
(8) Cut cardstock at 8x5
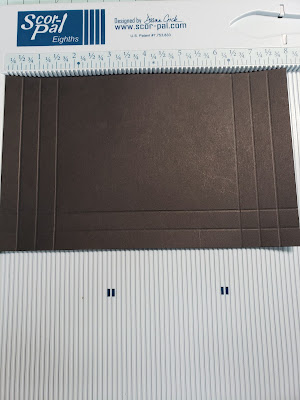
Score with short side across the top: 1/2 & 1
Score with the long side across the top: 1/2, 1, 1 1/2, 6 1/2, 7, 7 1/2
Cut away the 3 scored areas on each side along the bottom as shown above. Angle cut for a smoother fit.
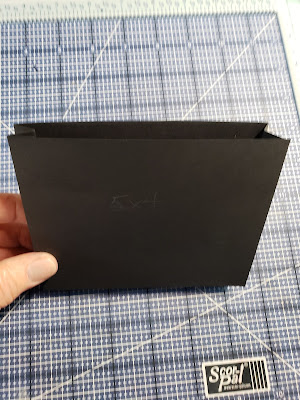
Accordion fold the score lines and burnish. Add scoretape to the tops of the accordion folded pieces. On the bottom edge fold it in on it's self and add scoretape.(8) Cut cardstock 5X4 this will be the face of the file pocket.Remove the tape backing from the bottom flap first and carefully line up the sides and stick them down to the bottom flap. Remove the side tape backing nextLining up the bottom and sides with the 5 x 4 piece stick it down. Your pocket file is complete and ready to paper.NOTE: Before adding papers, ink the edges. Papers for the pocket files are cut at: 4 3/4 x 3 3/4 this will give you a nice 1/8 border around the face of the pocket file.
I have a youtube walk-through of this project:
https://www.youtube.com/watch?v=8dQA5gv-86U
Please take a moment to subscribe to my channel as I will be posting many more projects.


No comments:
Post a Comment