Today I would like to share a design team project I just completed for Country Craft Creations in Hooper. Tamra sent me the Graphic 45 Mother Goose Collection, and OMG, I LOVE LOVE LOVE that collection!! I decided to make the Falling Photo Box (which I obtained the tutorial from The Gentleman Crafter), because it is so darn cute AND has so much space for photos! This was fun to create, and I did make a few changes to make it a bit more 'mine'.
Tamra said this Mother Goose collection is limited now as they are no longer producing it...so it is considered 'retired'. She has some in stock, so get with her to grab it while you can! I hope you enjoy this creation.

This is the front of the Photo Box in it's 'stand' and with it's lid on. Mother Goose herself is on the front along with Little Bow Peep. I did a lot of fussy cutting to get the images and adhere them on the box, but I love how it came together. Each side of the box has a different Mother Goose character. Flowers made from the paper collection I handmade to give some dimension. There are curly wires snuggled in with the flowers again to give some extra dimensional element to the piece. A black ribbon is around the lid edge tied up in a bow to complete the look.

Little Miss Muffet and the infamous spider lives on one side of the box. I made the spider dimensional with a pop dot and used a copper colored pen to draw on his legs and web so it would show up.

Rock a bye baby in the tree top! The other side houses this nursery rhyme character. Oh my gosh, fussy cutting that tree and the limbs and leaves took forever, but again, it was worth it to me to see the final results. I also fussy cut some of the flowers and used them to embellish the 'scene'.

The back side of the box has the adorable Humpty Dumpty! I fussy cut some of the flowers and added some dimension to the scene. The 'stand' is also embellished with handmade flower and glittery red wooden feet I sprayed.

This is the lid with the handmade flowers and curly wires. I also made some leaves that are also lifted to bring more interest to the project.

This is the 'base' or 'stand'. I embellished the front and back with some handmade flowers that work with the 'scene' on the box. The little red wooden feet I made completes the whimsical theme I think. Besides, black and white & RED just goes together! ;-)

The other side of the embellished 'stand'.

The lid off shows the full scene on the front.

The side view without the lid.

The other side without the lid.

The back side without the lid. See how the flowers on the 'stand' work well with the scene.
Holy cow! Look at all the space in this awesome box for pictures and journaling!!!! Wowza!!! The front panel down, has a pocket that has 2 large mats and 3 smaller ones.

Close up of the front panel dropped to show the pocket and additives.

These are all in that pocket!

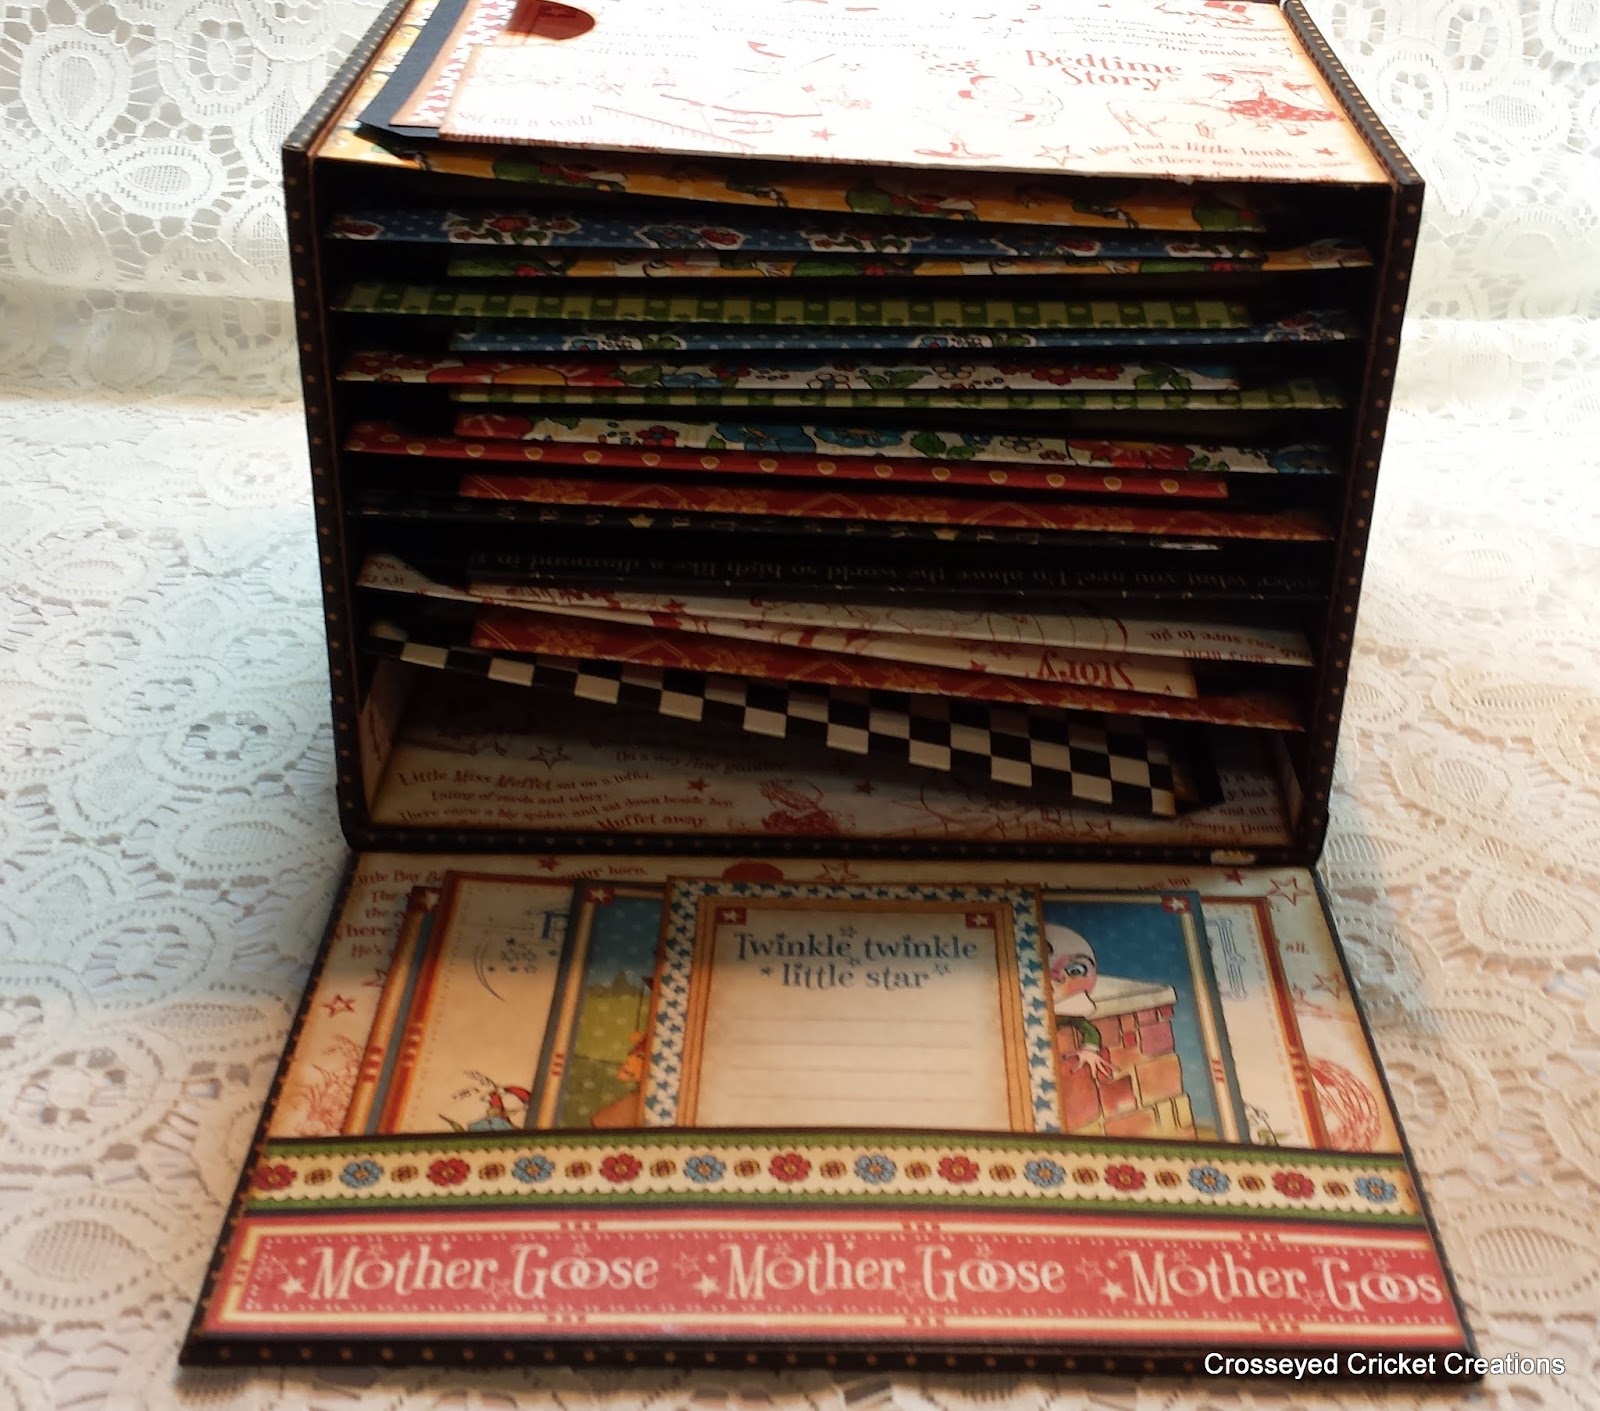
Falling Photo Box opened.... there are 8 pockets on the left side panel and 9 pockets on the right side panel all with inserts! Huge photo mats! The back panel has 8 very large pages with photo places and on the backsides (which are showing) there is a pocket that holds 2 tags/mats. So much space in this cool box!

Another view of the opened box.

Other side of the large pages.

The cool thing, these pockets are so roomy! You could honestly put so many pictures in them! On the mats inside the pockets, there is space to journal about the photos you would put in the pockets.

Another view of the pockets and mats inside them.

One more view of the pockets that stack so nicely!

Here is the front flap opened the sides are stacked and the back flap is opened. Wow! space space space!

A look at the top of the lid.

The other end of the lid close up. Love those flowers!

Another view of the top of the lid.
Thank you all for checking out this creation. I honestly loved doing it. I really like whimsical items, and this one turned out just that... very whimsical. I appreciate you stopping by, and any comments are certainly appreciated. Stop in again as I will be posting other creations again soon.
No comments:
Post a Comment