Pages

Friday, September 14, 2018

Photoplay Moments Collection
Ladies Desk & Folio Album
Ladies Writing Desk (completely handmade)

Inside the Ladies Writing Desk, there is plenty of storage for pens, pencils, scissors, stapler/staples, cards, writing paper, envelopes & stamps. What a pretty place to keep it all together.

Folio Album. I love the folios.....but I am also quite partial to the mini albums....so ....I thought I would combine the two and this is what I came up with.... A Folio Album. 
-------------------------
I am so happy to share my newest Design Team Projects for Country Craft Creations with everyone, as this was truly a fun fun collection to work with. The Photoplay Moments Collection is soft, delicate and feminine, I thought perfect to use to make a handmade 'Ladies Desk' and 'Folio Album'. A perfect place to keep the essentials to write notes, letters or cards all in one place. Pretty to boot, this makes for a perfect gift as well. 


The Folio Album measures: 9 x 6 x with a 1 1/2" spine
Plenty of space for larger photos 5 x 7's as well as smaller pics that will fit in the pockets on each page. 


Note the 'folio' construction of the album. This makes for a huge huge pullout with tons of space for pics and/or journaling, both a must of course to save for the future. Such beautiful papers to work with.


Turning one of the pages...........again, so much space in this sweet Folio Album! The cut a parts in this collection are perfect to use and on the back you can add a photo to the vintage pieces.


Another page showing the beautiful papers and the useful cut a parts. I've used them for the pockets as well as photo stops.


Another view of the Folio Album... so many ways to open and turn the pages.


Another pretty view of the pages...........flip, flip, flip to your hearts content!


Fun, fun, fun! I love the folio style of this album.


Expand, expand, expand!


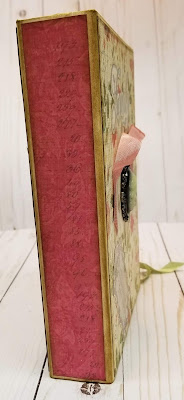
The spine of the Folio Album


I used medium weight chipboard to create this Folio Album also, and all the papers used are from the Photoplay Moments Collection. Materials List can be found below.


Inside that Ladies Writing Desk, shows the lid opened and laid back. I decorated the underside of the lid as well AND the inside of the desk. I created a divider to house the paper/envelopes on one side and pens, scissors, stapler, staples and such on the other side. Plenty of space in this desk. It measures overall: 10 1/2 x 12 x 2 1/2


Side view of the desk...........It slopes from 2 3/8" to 1 3/4" . I have inked it all for the vintage look.


The inside showing the pretty papers and some of the cut a parts used to decorate.


I used gold hinges and gold square brads as well as golden heart brads to hold the hinges in place (with a little help from crystal glaze in the holes to set it).

I hope you enjoyed these projects as I loved creating them! Below find the materials list and links to Country Craft Creations where you can find all the materials to create these projects. I have also included a link to my youtube walk through of these projects. I hope you take a moment to subscribe and if you have any questions, feel free to ask.

Materials List Ladies Writing Desk

Photoplay Moments Collection * Medium Weight Chipboard * Art Glitter Glue * Score Tape * Cream/Ivory Cardstock * Metal Hinges *  Brads to attach the hinges * Embellishments of your choice * Colored Photo Holders

Materials List Folio Album

Photoplay Moments Collection * Medium Weight Chipboard * Art Glitter Glue * Score Tape * Cream/Ivory Cardstock * Colored Seam Binding

Links
 https://www.youtube.com/watch?v=8j22rBUSevU&t=3s (Youtube walk through)
www.countrycraftcreations.com   (All materials available here)

Cutting Guide for the Ladies Writing Desk
Overall finished size: 10 1/2 X 12

Medium Weight Chipboard

2) 2 3/8 x 1 3/4 x 10  (sides)
1) 2 3/8 x 10  (Back)
1) 1 3/4 x 10  (Front)
1) 10 1/4 x 10 1/4  (Base)
1) 10 1/2 x 4 5/8  (Stationary top of lid) For extra strength, use 2 pieces glued together.
1) 10 1/2 x 7 1/4 (Lid) For extra strength, use 2 pieces glued together.

Cardstock

Connector strips are 1" pieces scored @ 1/2" 
1) 2 x 9 3/4 scored @ 1/2", 1", 1 1/2" fold and glue together to form the divider piece for the inside of the desk.

Pattern Papers

All papers are cut 1/8" shorter on all sides for decorating

*Art Glitter glue was used to attach the connector strips to build the desk as it dries quickly but does allow a little bit of 'wiggle time'.

-------------------


Tuesday, July 10, 2018


Design Team Project using Authentique's Companion Collection (Cat project)
 
What fun this one was to do!!! I did a project with this collection using the 'dog side' of the papers and thought it only fitting to use the 'cat side' to highlight the furry beauties! This Design Team Project is for Country Craft Creations and all of the materials can be found there. I will include a link at the bottom of the page.
 
I have made a cat bed with a 'pillow' box for the cushion. Cat snacks can be stored inside the pillow box and kept conveniently on top of the bed.
 
Side view of the cat bed showing the black shiny beads. I used them around all sides to bling the bed a bit.
Back view
Taking the 'pillow' box off the top
Pillow box opened to show storage area
Pulling the drawer out to show it separately
The drawer has a rounded top that serves as a 'stop' when pushed in and is decorative as well. I used a metal pull and added some matching black shiny beads to the front. I will look for some shiny black large beds to use for feet for the bed! Inside the drawer you can see the album waiting to be accessed.
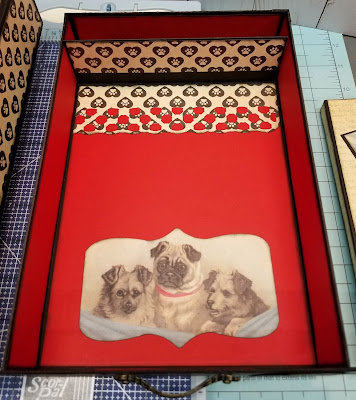
Removing the album, you can see the inside of the drawer is also papered. LOVE this collection!

The album! I papered the album in the newsprint paper from the collection and circled all the cat references, thought that was fitting to acknowledge them! I had the frame in my stash and it worked out perfectly. I added some of the stickers I matted for additional embellishing. A big fat golden paper clip keeps the frame closed and also adds interest.
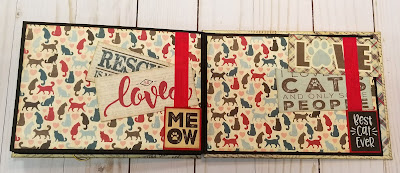
This album has soooooo many pages. I assembled it in a different fashion....I 'stacked' the pages rather than using a hinge system and added my cover pieces separately. It lays nice and flat and holds a ton!
I tried to be careful and not embellish each page much as I wanted to make sure it would fit in to the drawer under the bed. HOWEVER, each page will hold cut a parts and/or photos and journaling. Each page has cut a parts included which make perfect photo mats.


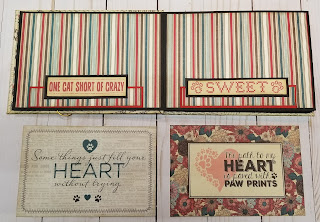
Check out these cut a parts... love them!


For this page, I fussy cut the cats from the pattern paper and used them as a bottom pocket to hold the cut a parts. Such a beautiful pattern paper!


Love these pictures! I made them in to little booklets to hold even more photos.


I hope you enjoyed this project and take advantage of snagging your collection over at Country Craft Creations. Below find the materials list, links and a link for my youtube walk through. Please take a moment and subscribe to my channel so you don't miss any of my projects I share. Thanks for taking your time to view, I certainly appreciate it.
 
Materials List
Authentique's Companion Collection * Red cardstock * Black cardstock * Medium Weight Black Chipboard * Art Glitter Glue * ScoreTape * Colored Seam Binding * Metal handle (my stash) * Black shiny beads (my stash) * Large Wire paper clip (my stash)
 
 
Links 

Wednesday, June 27, 2018

Wow, June is coming to an end already, gee, seems like summer has only begun. When it gets so hot out though in the summer, I can't help but worry about all the critters that have to reside outside. I always hope they have shelter, fresh cool water and plenty to eat. We have had our share of critters.... ranging from horses, mules, a pig, chickens, cats and of course dogs. Over the years we have enjoyed them all....but now, we only are hosts to our beloved furbaby Molly who we adopted 13 years ago from a shelter and 2 sweet barn kittys that are spoiled rotten as well and keep the barn rodent free...in return they have their very own room complete with several beds (to accommodate the various weather) and plenty of yummy food they get daily along with snacks of course.  :-) At any rate, I love them all!
I was so happy to receive this Authentique Collection called Companions to work with for my newest Design Team Project. It certainly is a tribute to all the beloved dogs and cats and so fun to work with! I hope you all enjoy this project.
 
Dog House with Folio
using Authentiques Companion Collection
 
This is the package I received with that awesome collection inside. I knew at first glance it was going to be an easy one to work with!
 
This is what I came up with! A dog house that also serves as a treat holder with a removable roof and a folio holder with the drawer in the base. I wanted the sentiments on the base to stand up and show well, so, they indeed are standing.
Of course, we have to have a cool red shingled roof! I punched each of these shingles using a square punch..wanted it to appear like a shaker roof. I used black Prima Ink to all the pieces including each and every shingle. A matted cut a part was used to embellish the roof just a tad more.
 
A side view.... of course you have to have a sign on the side saying 'No Cats'.....hehehehe
View of the other side...with the cut a part 'Sweet' matted and inked.


Open the drawer and inside I papered and embellished it as well. There is a folio inside and a section in the back of the drawer for pens.....you need to have them on hand to journal in that folio you know! I embellished the outside of the drawer also using a metal pull and a matted and inked cut a part.
Nice and roomy drawer, would hold a much larger folio and even some memorabilia.
Inside the drawer showing the back pen holder section too.
Yes folks, I even embellished the inside of the drawer! Couldn't help myself, there are so many cool pieces in this collection, the hardest part is deciding what to use!!
Remove the roof to show the inside of this dog house. Inside, the walls are all papered and of course pictures and a poster is hung. I even created an area rug using one of the stickers/cut a parts that I reshaped.
Ahhhh yes, a picture of Dad on one wall....
....and a picture of Mom! Both are hanging on the walls....home sweet home!
The drawer has a rounded edge and is slightly wider to ensure a nice even stop when it's closed. Notice the big wooden black ball feet on the bottom of the base.
The folio. I used 2 large Basic Grey Magnets for the closure and embellished the cover. I love this collection! The papers are just so darn cool! I used them throughout this folio and used black and red cardstock for my mats and bases. Some of the embellishments are pop dotted for interest. Love those cut a parts!! Prima Black ink is the ink of choice as it does NOT smear, which to me is a major plus!!
The back of the folio is also embellished.
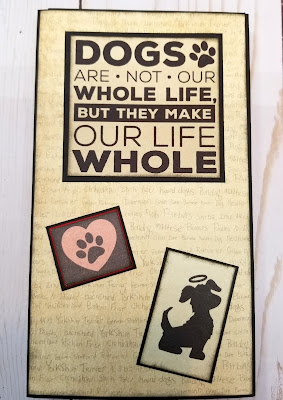
Opening just the first flap of the cover.... there is a pocket and on the facing page, a dog tag on that paper that is the perfect place to add your pooch's name.
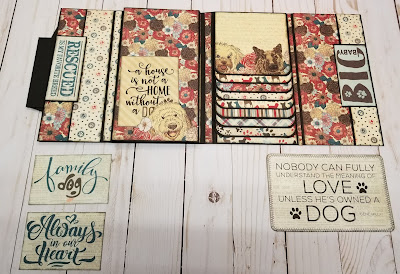
Showing the folio opened to reveal the inside of the front and back covers with the long pockets. The waterfall is also visible (my favorite technique to use), and the pull out section is yet to show itself.
The items from the pockets with ample space to hold way more!
The cut a part above is from the space above it. I did some fussy cutting and from one of the pieces of pattern paper, cut the adorable dogs and flowers and used them as photo mat holders on the bottom of some of the pages!!
Look at the cut a parts (Photo mats) above.... each of them reside behind one of the fussy cut dogs on each page, with room for more more more!
Here they all are inside their cozy fussy cut holders.
This is the other side of that glorious accordion pullout!!! So much space!! Of course, more fussy cutting for more bottom holders.
Waterfall.... I papered the fronts and used red cardstock for the backs to add pictures and/or journaling to.
Under the waterfall is another pocket that I embellished with one of the matted stickers 'Companions' and the cut a part tag/mat is what hangs out there.
I hope you all enjoyed this project as much as I did making it!
Check back soon as I will have another project using this collection posted.....geared to the cats! :-)
 
Take a moment to check out my walk through youtube video: